Dyeing the crinoline!
I was so excited about this DIY project, and it definitely had a couple moments of frustration, but overall was a lot of fun. Many thanks to my brave BM and bff, Carrie, who donated her washer to the cause.
The Essentials:
We started with two bottles of wine colored liquid Rit dye. I picked them up at Michael's and Hobby Lobby, but I'm told you can find them at Wal-Mart as well. They were about $4 a bottle. There are also powder packets, which are cheaper, but you have to prepare them, and not all the colors are in both forms of the dye.
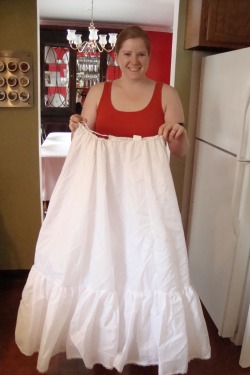
I bought my very unfluffy crinny (it's probably half of the DB 'medium' crinoline size) online for $15, after realizing the DB one I got on Ebay was WAY too big. We also used a pair of dishwashing gloves (the yellow kind), and a bucket, as well as some bleach.
We prepped the crinny while the washer was filling up with HOT water, on the large load size. The crinny was unceremoniously shoved into a sink of hot water. This worked well for my crinoline's size, but I recommend either using the washer before you add the dye, or the shower, for larger crinnys.
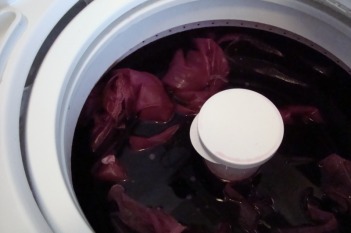
Next, the dye was added to the washer, and we let it agitate for a minute, so it could mix well. Side note: We used two bottles of dye, and the crinny was done in one 30 minute run.
I bought my very unfluffy crinny (it's probably half of the DB 'medium' crinoline size) online for $15, after realizing the DB one I got on Ebay was WAY too big. We also used a pair of dishwashing gloves (the yellow kind), and a bucket, as well as some bleach.
We prepped the crinny while the washer was filling up with HOT water, on the large load size. The crinny was unceremoniously shoved into a sink of hot water. This worked well for my crinoline's size, but I recommend either using the washer before you add the dye, or the shower, for larger crinnys.
Next, the dye was added to the washer, and we let it agitate for a minute, so it could mix well. Side note: We used two bottles of dye, and the crinny was done in one 30 minute run.
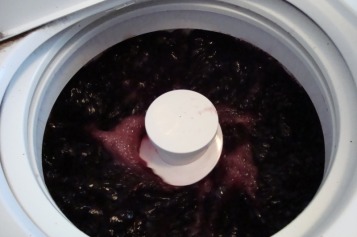
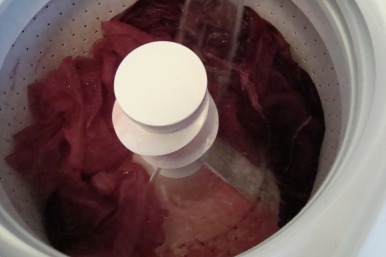
The washer we used had a 15 minute cycle, so we had to restart it when it came close to the end (so all the dye didn't drain out!). Keep that in mind while doing this! So, we added the crinny to the washer, and let it run for 30 mins. Remembering what others before me had said, we checked it for tangles every 3 or 4 minutes. At the end of the 30 mins, a cold rinse cycle, and a spin down, we pulled out my gloriously wine colored crinny.. which was also.. tangled. It turns out, you really do need to pull it *all the way* out of the washer. It looked fine when we only partially pulled it out, section by section, but I ended up with a tye dyed crinoline, in a dark color. What to do??
We ended up heading out to JoAnne fabrics, buying another bottle of dye, and pulling out the aforementioned bucket. Only the top of the crinoline was twisted, so after we rinsed (and rinsed) the crinoline out again in the shower, we ended up putting the bucket in the tub, mixing the dye, and only soaking the tye-dyed portion in it until it looked about right. Then, we rinsed a lot more. A LOT more. Until the water ran clear. We took the crinny back downstairs, spun it down again, and I took it home in a garbage bag, one happy customer.
Cliff notes- It was a lot of fun, and I would do it again, after having done it once. That being said, I totally recommend doing this in the bucket- it takes away the chance of having a twisted crinoline and the problems it caused me. I'd dye in the bucket, then rinse/ spin in the washer, if you have the choice.
The finished product!
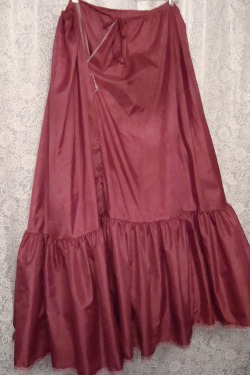
It's actually a bit darker than this in real life, but here's the finished product, drying in my parent's bathroom. The color is beautiful, and I'm really happy with how it ended up. I had it on for my first fitting, and it just pops when I lift up the skirt a bit! It also makes my ivory shoes pop, when they're next to the crinny. All in all, I'm really happy I decided to do this project!
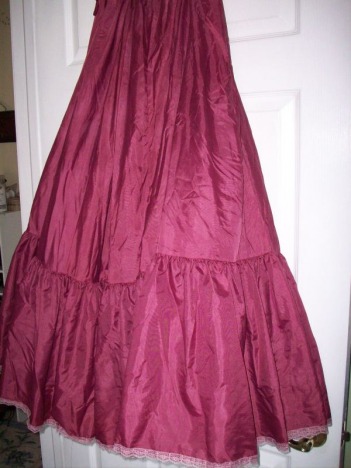
This is a better picture of what it looks like!

Tips and tricks:
A couple of things we learned from our experience, that you may want to take into account.
- Make sure the water in your washer is as hot as possible. It helps the dye bind better to the fabric, and do a cold wash to set it.
- We used two bottles of dye, because I wanted a bold, dark color. I recommend only using one, and possibly going for longer with the run if you want a lighter color. My crinny ended up a smidge darker than I wanted, but I'm okay with it. Others may not be!
- A bucket is probably the best way to dye the crinny, in my opinion. It wouldn't have been any harder, and the problems with the crinny twisting would've been completely avoided. We tried just shoving it in, and putting the middle of the crinny around the center of the washer, and it still tangled.
- We ran a bleach cycle on the washer after we dyed the crinoline, and the washer was sparkling clean afterwards. If your washer splashes like Carrie's did, I suggest wiping up the droplets as you go. We only had to clean a small area right above the water line in her washer by hand, to make sure we got all the dye.
- If I remember correctly, the packaging suggested adding salt to the dye/water in the washer- I completely skipped this step, and seemed to have no ill side effects from it. Save yourself the cup of salt.
